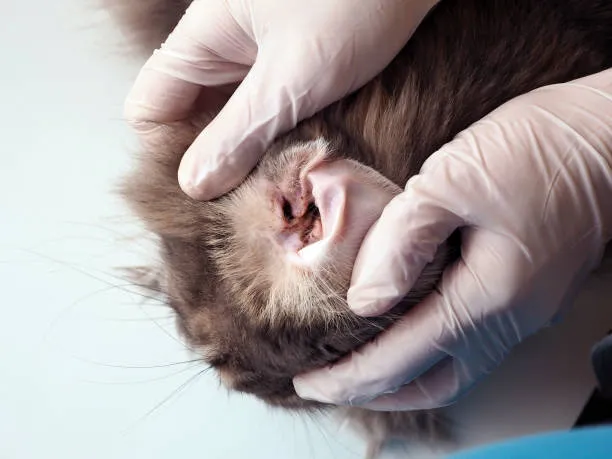
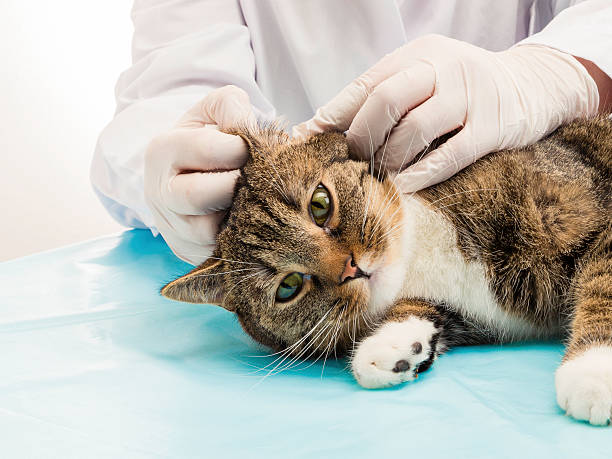
Does your feline friend seem persistently bothered by their ears? Shaking their head incessantly, scratching furiously, or exhibiting unusual dark discharge? These could be signs of a common feline ailment: Ear Mites in Cats.
Don’t fret, you’re not alone! This guide provides a comprehensive, 18-step approach to effectively eliminate ear mites in your cat, ensuring their comfort and well-being. So, let’s conquer those pesky critters and restore peace to your furry companion’s ears!
What are Ear Mites
Ear mites, scientifically known as Otodectes cynotis, are tiny, eight-legged parasites that take up residence in the ear canals of cats, dogs, and other mammals. These unwelcome guests feed on earwax and skin debris, causing significant irritation and discomfort. While highly contagious between animals through direct contact, ear mites are not zoonotic, meaning they cannot be transmitted to humans. However, they can wreak havoc on your cat’s well-being if left untreated, leading to excessive scratching, inflammation, and even secondary infections. Early identification and intervention are crucial to ensuring your feline friend’s comfort and preventing potential complications.

steps
1. Schedule a Vet Appointment
Ear mites are highly contagious, and early diagnosis is crucial for effective treatment. Don’t wait for symptoms to worsen! Schedule an appointment with your veterinarian as soon as possible. They can accurately diagnose the presence of ear mites and determine the most appropriate treatment plan based on your cat’s individual needs.
2. Gather Essential Supplies:
Before your vet visit, prepare the following items:
- Veterinarian-approved ear mite medication: Your vet will prescribe the most suitable medication based on your cat’s age, health, and the severity of the infestation. Examples include topical drops or oral medications.
- Gentle ear cleaner: Choose a vet-recommended ear cleaner specifically designed for cats. Avoid harsh products containing alcohol or hydrogen peroxide, which can irritate your cat’s delicate ears.
- Cotton balls: Soft cotton balls will be used to apply the ear cleaner and gently wipe away debris.
3. Warm Up the Medication (Optional):
Slightly warming the ear medication can make the application process more comfortable for your cat. Place the sealed vial in a bowl of warm (not hot) water for a few minutes. However, always follow the specific instructions provided by your vet.
4. Secure Your Cat for Treatment:
Gently restrain your cat in a secure and calm environment. Enlist help from another person if necessary to ensure both your and your cat’s safety during the treatment process. A towel or a cat carrier can be helpful for this purpose.
5. Apply the Medication:
Following the veterinarian’s instructions, apply the prescribed ear medication directly into the affected ear canal. Hold the dropper close to the ear opening, but avoid inserting it deeply to prevent accidental damage.
6. Massage the Ear Base:
Gently massage the base of your cat’s ear for 30-60 seconds. This helps distribute the medication evenly throughout the ear canal.
7. Clean the Ear (Optional, depending on vet’s instructions):
If instructed by your vet, use a cotton ball dampened with the ear cleaner to gently wipe away any visible debris or discharge from the outer ear. Do not insert the cotton ball into the ear canal, as this can damage your cat’s hearing.
8. Repeat Steps 5-7 for the Other Ear:
Repeat steps 5-7 for the other ear, using a fresh cotton ball for each ear to avoid cross-contamination.
9. Follow the Treatment Regimen:
Continue administering the medication according to your veterinarian’s prescribed dosage and frequency for the entire recommended duration, typically 7-10 days. Even if symptoms seem to improve, completing the full treatment is crucial to eliminate all stages of the mite life cycle and prevent recurrence.
10. Clean Bedding and Belongings:
Thoroughly clean your cat’s bedding, blankets, and other belongings in hot water (at least 140°F/60°C) to eliminate any lingering mites or eggs. Consider replacing heavily infested items, especially if the infestation is severe.
11. Treat All Household Cats:
Ear mites are highly contagious. If you have multiple cats, treat all of them simultaneously to prevent the infestation from spreading. Consult your veterinarian to determine the appropriate treatment for each cat.
12. Monitor for Signs of Infection:
While ear mites themselves are not life-threatening, they can lead to secondary ear infections. Be vigilant for signs like:
- Increased head shaking
- Excessive scratching at the ears
- Redness and swelling of the ear canal
- Dark, thick discharge from the ears
13. Seek Additional Veterinary Attention:
If you notice any signs of a potential ear infection, immediately return to your veterinarian for prompt diagnosis and treatment. Ignoring an ear infection can lead to serious complications.
14. Preventative Measures:
Once your cat is free of ear mites, take steps to prevent future infestations:
- Regularly clean your cat’s ears with a vet-approved cleaner.
- Schedule routine checkups with your veterinarian, including ear examinations.
- Maintain a clean environment by regularly vacuuming carpets, washing bedding, and cleaning your home.
15. Avoid Cotton Swabs:
Never use cotton swabs in your cat’s ears. These can easily damage the delicate ear canal and exacerbate the problem.
16. Regular Cleaning of Belongings:
Maintain a clean environment by regularly washing your cat’s bedding, toys, and other belongings. This helps prevent the spread of parasites and other potential health concerns.
17. Schedule Regular Checkups:
Regular checkups with your veterinarian, including ear examinations, play a vital role in early detection and prevention of ear mites and other health issues. Aim for annual checkups or follow your veterinarian’s specific recommendations for your cat’s individual needs.
18. Be Aware of the Signs:
Stay vigilant for any signs of ear mites in your cat, including:
- Head shaking: Excessive head shaking is a common indicator of discomfort in the ears.
- Scratching at the ears: Frequent scratching at the ears, especially if accompanied by redness or discharge, can be a sign of irritation caused by ear mites.
- Redness and swelling: Inflammation and redness around the ear canal can be indicative of an ear mite infestation or a secondary infection.
- Discharge from the ears: Dark, thick discharge from the ears is a common symptom of ear mites and should not be ignored.
Remember: Early diagnosis and treatment are crucial for effectively eliminating ear mites and preventing complications in your feline friend. If you suspect your cat has ear mites, don’t hesitate to schedule an appointment with your veterinarian for prompt and proper care.
Why Home Remedies are Not Recommended:
While some online resources might suggest home remedies like olive oil, apple cider vinegar, or herbal concoctions for treating ear mites, veterinarians strongly advise against them. These methods pose several risks:
- Ineffectiveness: Home remedies often lack the potency needed to eliminate the entire mite population, including their eggs. This can lead to a relapse of the infestation and potentially worsen the situation.
- Irritation: Some homemade solutions can irritate your cat’s delicate ear canals, causing further discomfort and inflammation.
- Delaying Treatment: Relying on unproven remedies can delay seeking proper veterinary care. This can lead to the infestation spreading and potentially causing secondary ear infections, which require antibiotics and can be painful for your cat.

Additional Information:
How Cats Get Ear Mites:
Ear mites are highly contagious and can be transmitted from:
- Direct contact: Sharing bedding, toys, or food bowls with infected animals.
- Mother to kittens: During nursing, kittens can acquire ear mites from their mother.
- Outdoor environments: Contact with stray or wild animals carrying ear mites.
Preventing Ear Mites:
- Regular ear cleaning: Using a vet-recommended ear cleaner every 1-2 weeks can help remove debris and create an environment less hospitable to mites.
- Parasite prevention: Regularly administer veterinarian-prescribed parasite prevention medication to protect your cat against various parasites, including ear mites.
- Maintain a clean environment: Regularly clean your cat’s bedding, toys, and environment to reduce the risk of mites and other parasites thriving in your home.
Can Humans Catch Ear Mites from Cats?
No, humans cannot catch ear mites from cats. Ear mites that infect cats are a different species than those that can infest humans. While highly contagious between animals, they are not zoonotic, meaning they cannot jump species and infect humans.
Early Treatment with Pet Insurance:
Having pet insurance can help cover the costs associated with diagnosing and treating ear mites in your cat. Early intervention can prevent complications and ensure your furry friend receives prompt and proper care. Consider exploring pet insurance options to provide financial peace of mind when unexpected veterinary needs arise.
Remember, consult your veterinarian for any concerns about your cat’s health, including ear mites. They can diagnose the problem accurately, suggest the most effective treatment plan, and ensure your feline companion receives the best possible care.tunesharemore_vert
Conclusion
Ear mites, while common, can be a source of significant discomfort and potential health complications for your feline friend. However, by following these 18 comprehensive steps, you can effectively eliminate ear mites from your cat’s life and restore their comfort and well-being. Remember, early diagnosis and professional veterinary care are paramount to successful treatment.
This guide equips you with the knowledge and resources necessary not only to eliminate existing ear mites but also to prevent future infestations. By implementing these steps and maintaining a vigilant awareness of the signs, you can ensure your cat enjoys a healthy and happy life, free from the itch and irritation caused by ear mites.
If further questions or concerns arise regarding your cat’s health, don’t hesitate to consult your veterinarian. Their expertise and guidance are invaluable in ensuring your furry companion receives the best possible care.


